The ROCK 4C+ single board computer can run several 64-bit Linux distributions, with Debian, Ubuntu Server and Android 11 being officially supported. In this Getting Started, we show how to install Debian Bullseye onto an SD card and perform the system setup. This will give you a lightweight, dynamic and functional XFCE desktop for general use on your ROCK 4C+, from which you can add further Open Source applications to your liking.
Parts Needed to Get Started with ROCK 4C+ on Debian:
- A power supply rated 9-12v max (we have used 5.1V / 3A Universal Power Supply 15.3W USB-C in this example due to stock availability)
- 32 GB MicroSDHC Card Class 10
- Host computer Windows/Mac/Linux
- HDMI monitor
- USB keyboard
- USB mouse
- micro-HDMI cable
- Cat 5 Ethernet cable
- Internet connection and router
STEP 1: DOWNLOAD OS
Download a copy of the Debian Desktop OS for the ROCK 4C+. You can do this using either a Windows, Mac or Linux host PC or laptop. Save the image file to somewhere convenient on your storage. We used the Downloads directory on a Windows PC:
- Visit the OKdo Software & Downloads hub and click the Debian Bullseye link in the ROCK 4 Model C+ row
- Allow the image file to download – it is about 700 MB in size
- The filename will be similar to this depending on the version date; rockpi-4cplus-debian-Bullseye-xfce4-arm64-20220901-0325-gpt.img.xz
- There is no need to expand the compressed file.
Note: There are several other Linux Operating Systems to choose from on the downloads page. The installation process is similar for all of them.
STEP 2: IMAGING SOFTWARE
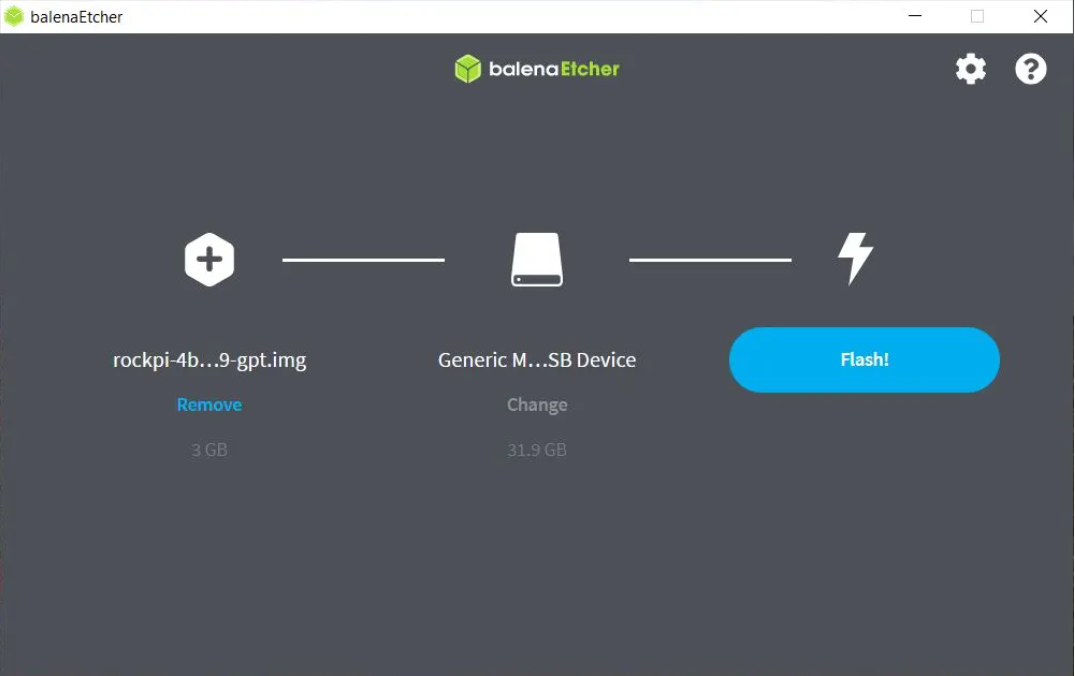
An OS image cannot be copied directly to an SD card as you would a normal file or directory. You need a special purpose imaging software to flash the image to the SD card. We recommend the Open Source balenaEtcher, which is available on either Windows, Mac or Linux. It also performs some validation checks on the flashed image:
- Visit the download page at balenaEtcher and install the version for your host PC.
STEP 3: FLASH SD CARD
Now everything is ready to flash the OS image onto the microSD card. Use a good quality, branded, 32GB card or larger. We use SanDisk Ultra cards which are fast, durable and reliable.
- Insert the SD card into a card reader on your host PC
- Open balenaEtcher and select the OS image you downloaded in Step 1
- Select the SD card to flash – be careful to choose the correct one
- Click the Flash button
- Wait for the imaging and validation process to complete, then eject the SD card and remove it from your host PC.
Tip: If your system asks you to format the card at any time, just click cancel.
STEP 4: CONNECT CABLES
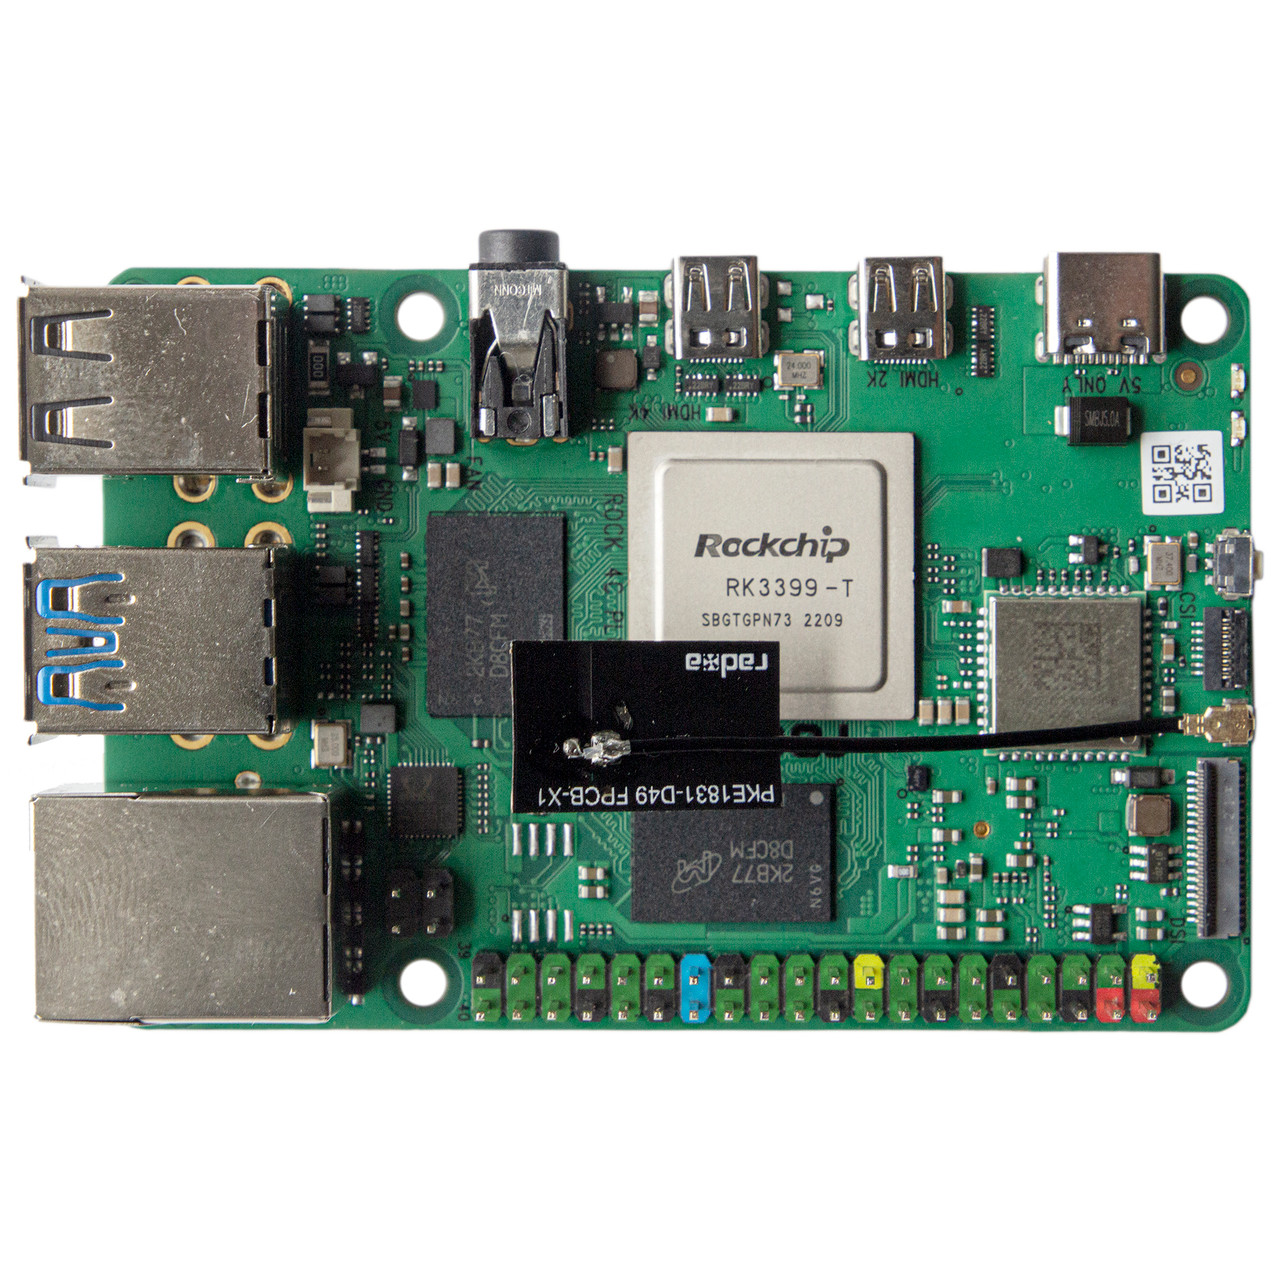
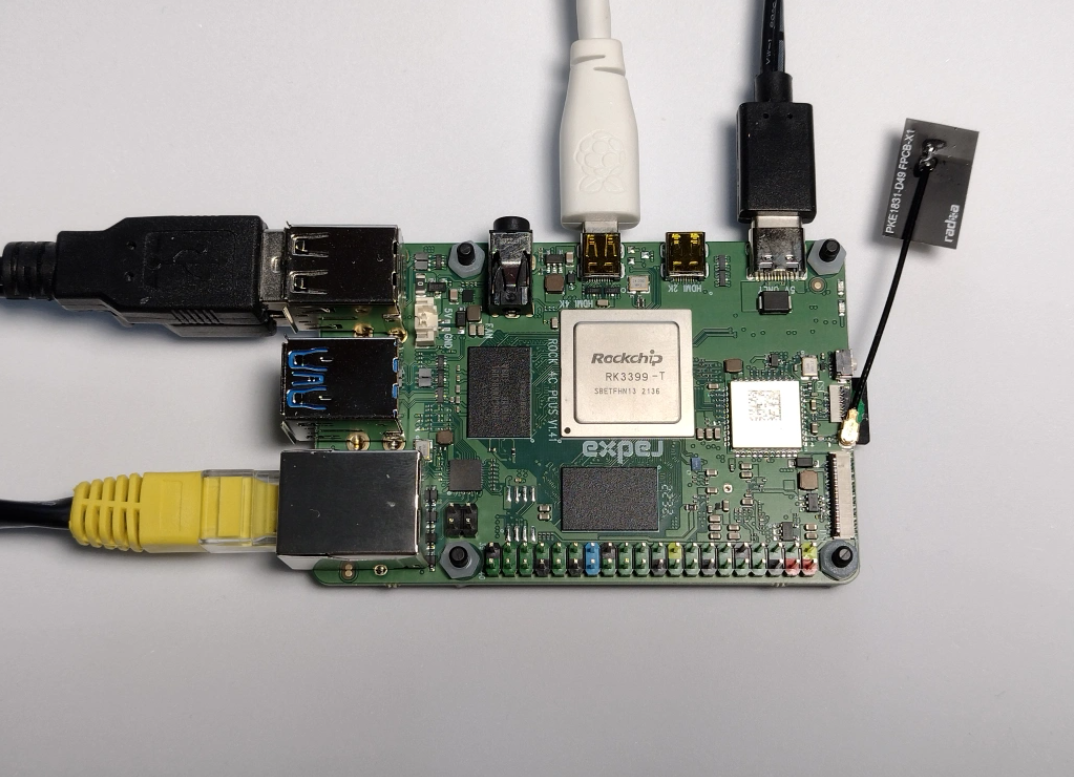
Now that your SD card is prepared, connect a keyboard, mouse and monitor and attach to Ethernet. The ROCK 4C+ has dual HDMI connectors, one which supports 2K up to 1440P@60fps and the other supporting 4K@60fps displays. You can connect 2 monitors at the same time if required. The HDMI audio output is only available on the 4K connector next to the audio jack.
- Carefully rotate the external WiFi / Bluetooth antenna, so it clears the board
- Connect a keyboard and mouse to the USB 2.0 (Black) sockets
- Attach a micro-HDMI cable to the 4K HDMI output and your monitor
- Connect a CAT5 Ethernet cable to the Ethernet port and your internet Router / Switch
- Carefully insert the SD card into the card socket with the gold pins on the card facing upwards
- Connect a 5V / 3A power supply to the USB-C socket but do not plug it in yet.
Tip: We recommend fitting stand-offs to the board mounting holes to lift the board off the bench and to improve cooling.
STEP 5: BOOT
Check that everything is prepared as in the steps above, turn on your monitor and plug in the power supply to boot the ROCK. When the login dialogue appears, the default username is rock with password rock. We recommend changing the password to something more secure in the next step.
- Plug in the power supply
- The green power LED will turn on, and the blue activity LED will start blinking a heartbeat after a few seconds
- The first boot takes about 30 seconds; the monitor may be blank, so just be patient!
- Suddenly the XFCE Desktop will appear with the login dialogue box
- Login with the default username and password, and the standard desktop will appear.
Tip: Customise many of the XFCE features by selecting Applications -> Settings from the main menu.
STEP 6: CHANGE THE PASSWORD
Using Terminal from the menu, change the default password to a more secure one:
- Open Applications -> Terminal Emulation
- Enter the following command at the prompt and follow the instructions to set a new password:
STEP 7: UPDATE THE SYSTEM
The system and installed software is constantly being updated, so you can pull in these updates with the following commands as superuser (sudo) using Terminal. It is advisable to do this on a regular basis to keep your system secure:
- Open Applications -> Terminal Emulation
- Execute the following commands at the prompt:
STEP 8: SET DISPLAY (OPTIONAL)
Your HDMI display settings should be recognised automatically; if they need adjusting, you can set them using the Display Manager from the Applications menu:
- Right click anywhere on the desktop background and select Applications -> Settings -> Display
- Select your monitor Resolution and Refresh rate
- Click Apply
- Wait for the display to reset.
STEP 9: SET KEYBOARD (OPTIONAL)
The default keyboard setting is English US. This can be changed using the Keyboard Manager:
- Click Applications -> Settings -> Keyboard
- Select the Layout tab
- Uncheck the Use system defaults check box (so the Add button becomes selectable)
- Click the Add button and select your keyboard from the dropdown list
- Select the US keyboard and Delete it (otherwise, it will change back on the next boot).
The keyboard setting will change after rebooting.
STEP 10: SET TIMEZONE (OPTIONAL)
The default time setting is Universal Time (UTC). If you want to use Local Time, you can set this using the timedatectl command in Terminal with superuser privileges:
- Open Terminal from the menu, Applications -> Terminal Emulator
- Display a list of available timezones by typing the following command (press F key to page forward):
<code>timedatectl list-timezones
- Set your local timezone from the list using this command with the example for London, UK:
<code>sudo timedatectl set-timezone Europe/London
- Check the settings with the following command:
STEP 11: SET HOSTNAME (OPTIONAL)
You can set a new Hostname for your system using the hostnamectl command in the Terminal as superuser (use only ascii characters, numbers and hyphens) – we set ours to rock-4cp:
STEP 12: REBOOT
Now that everything is configured how you want, reboot the system from the menu to enable all the settings:
- Click Applications -> Logout -> Restart
Let the system reboot, log back in, and you are ready to go!
STEP 13: CONFIGURE WIFI (OPTIONAL)
WiFi can be configured from the Terminal as superuser with the following commands, replacing the text in angle brackets with your own settings:
sudo nmcli r WiFi on
sudo nmcli dev wifi connect ”<ssid>” password “<password>”
Wifi settings are stored in the file /etc/NetworkManager/system-connections/<SSID>.nmconnection
WiFi can be turned off with:
sudo nmcli radio WiFi off